That’s right! Not only did I move from Brisbane to Vancouver but I got a job at the exact company I was aiming for – Double Negative Visual Effects!
I’ve been interested in working for them ever since I saw their work on Inception (2010) and then Eva in Ex Machina (2015).
Click here to see what is in production currently.
Currently I’m in my third week there working on a film (oooh mysterious!). It’s a much bigger facility than I’m used to with about 400 employees in the Vancouver office but everyone I’ve met there is totally lovely.
They’re teaching me how to use Linux and how to handle viewing my shots on a bigger screen without cringing.
Bit by bit, I will teach them about my punny sense of humour. I don’t want to PUNish them too quickly.
Down time. It’s what you get when you have a break between ads (isn’t that ironic?).
The by-product is you’re itching like a flea-ridden woolly jumper to do something that keeps you on your toes.
A little while ago when I had down time back in Brisbane and was hunting around with my itchy jumper on, I came across this series of videos from Animation Mentorcalled “Anatomy of a Fight”. I watched them all and found they were fascinating body mechanics to study.
I’ve loved UFC for a while now and always admired how they can create so much force with a strike. If it weren’t for the fact that I need my money makers (my hands), I would actually take up MMA as a hobby. But never fear! As an animator, we have a tool called the computer that will let you try out your hobbies risk free!
Well, RSI and obesity caused by a sedentary lifestyle aside, practically risk free. So why not save my hands in the short term and just punch something digitally?
SKETCHES
Per usual, I started my study with thumbnail sketches of fighters in action.
I was pretty happy with them. Fighters can be as graceful as dancers I found.
STRIKE
I decided to start with a punch or strike first as a test.
I found an elbow strike that I really liked from this video. I chose it because the camera was fairly still, the movement was quick and it looked like the striker wasn’t holding back too much in delivering force:
Source: Youtube.
Using the lessons I’d learnt from the videos, I tried to convey the power in the reference while animating. I used the gorilla rig at work from the Vellfire ads to animate my strike along with the reference.
As you can see the animation follows the timing of the video but exaggerates the poses on some of the extremes for more impact. Like a lot of realistic animation, if you don’t wind up the poses and just follow the reference exactly, the animation feels quite vanilla.
You can see above that most of the exaggeration involved twisting the torso more and changing the angle of the shoulders.
And here’s how it looks from the front with my grease pencil notes.
I couldn’t see the feet so I assumed there could be a step for a weight change and made sure to capture the snap in the hips.
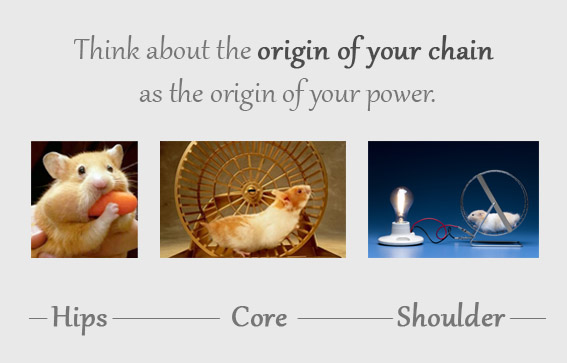
I never realised how important your core is for driving the slingshot movement of a hit until I watched that series of videos I mentioned earlier. Dr. Stuart Sumida said (basically) for punches:
Your arm isn’t actually where you get the most power. If you just used your arm to punch, you’d look like one of those kangaroo pens with boxing gloves. *Which are awesome in their own right. Hours of entertainment on a writing utensil? Yes please*. Nor is your shoulder the actual base of the power.
It all starts at the root of the chain. So if you can whip the root of the chain around first, your secondary links (your core, your shoulder, your fist) will also follow through like a whip, delivering more force for you to whip it good. *Dun na na na nah! Dum, pshh, dum, pshh.*
KICK
Then after that test I started thinking about kicks.
A great reference for kicks (or any fight sequence for that matter) can be found in the movies of the legendary Jackie Chan. This video not only explains how he achieves such perfect action-comedy fight sequences physically, but how he films them as well:
I decided to focus on finding a kick of Jackie’s that I like with an extra gorilla in there for the sake of showing impact and found this one:
I liked it because it has the little hop before the kick where his screen left leg scrunches up and then POW! snaps out.’
Using this video reference I planned it out with thumbnails.
Then I used the video ref to create help with the timing of the stepped blocking and came up with this:
With a bit of re-timing and polish, I finished with this:
Not perfect (even now I can see potential tweaks) but it was an exercise so I’ll forgive it.
Luckily my lead animator Chris was on hand to give me tips on the timing and how to make the impact of the screen-left gorilla hitting the wall jolt more realistically. Really throwing the head back and then jolting it forward two frames later makes the impact feel more intense. I did a bit of that on the legs too, making them have some rebounding action off the floor.
With the screen-right (SR) gorilla, it was hard to not make him feel too snappy when he extends that leg for the kick. I had to slow down the SR arm by a frame or two so that the spacing wasn’t too far and the arm didn’t whip back and forth like Willow Smith’s hair.
What Dr Sumida (roughly) said about kicks is also true:
Guess when it comes to finding power in fighting you could TORQUE about hips all day huh? AHHHHHHH *badum tsshhh*.
SEQUENCE
I ended my experiments with fighting there but if I could keep going in my spare time, I would aim to do something like this:
This is one of Steve Weebly’s animated loops (you should totally check out his website for more).
They’ve been travelling around the internet so you may have seen this already but all of his animated loops are AWESOME.
I liked the choreography of the fights so much that I actually sent him an email to ask him how he does it.
To paraphrase his answer, he talked about scribbling down all the ideas he would like to see come to life in the sequence, selecting the ones that work best. Then once you pick the first move, it’s just a matter of figuring out how many of those actions you can fit in so that it finishes somewhat similarly to the first move. After that, animate away!
The whole method sounds like figuring out the steps to a dance (which could be a little complicated for Miss Naturally Clumsy of the Year over here). Yet the idea of trying out a whole sequence one day sounds really fun.
Hopefully someone else reading this might decide to try it too!
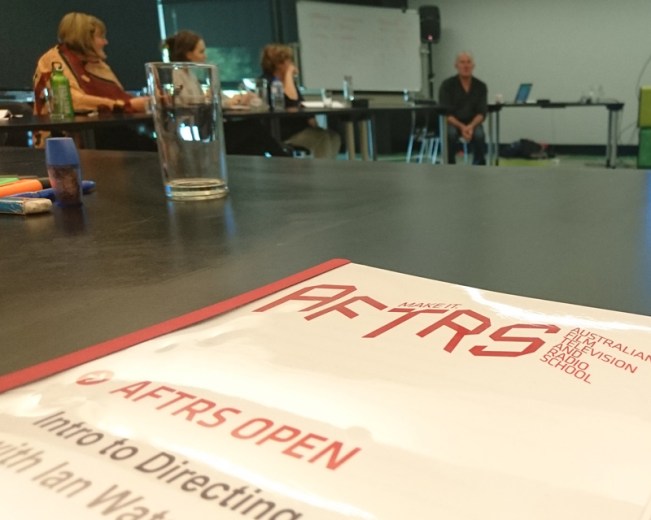
This past weekend I attended a short course through AFTRS (Australian Film Television and Radio School) called ‘Introduction to Directing’. The host was Ian Watson, an Australian director who has directed on various successful TV shows including ‘Underbelly’.
Let me tell you I did not have high hopes. All I was hoping for was at least 1 new piece of knowledge and that anyone sitting next to me would wake me nicely if I drooled over their elbow.
I was ecstatically wrong. There was a wealth of knowledge and my eyelids remained snapped open (despite the fact that I’d had only 2 hours sleep).
Instead of wading through this Scrooge McDuck wealth of knowledge, I’ve decided to pluck out the real gems that made my ears prick up. The ones that you could make some giant earrings out of and still have some left for a set of grillz.
Here they are:
1. Make the premise as short as possible.
Every scene, every script, every beat has a premise, a concept that it is trying to convey. Figure out what it is and make it short. For example, you could be wanting to drive conflict by telling actors the premise for a scene is:
OR you could achieve the same result by saying:
Nicer huh?
2. Don’t micromanage in small teams.
There can be a tendency to want to control a lot in a small team. You have to trust that everyone knows what they’re doing. Let them do what they’re there to do.
3. Every time we cut, we break tension.
This is something that made complete sense when I heard it, but I had never actually considered. It’s possibly why the infamous “long take” shot in Children of Men (Alfonso Cuarón, 2006) makes me feel so uptight. In this shot, I feel as if the world is incredibly fraught with danger for Clive Owen’s character because you never get a break from following him, you aren’t offered another perspective and everything happens in real time. It’s a relentless way of forcing the audience to stay within the moment.
That being said….
4. Use cuts to punctuate beats.
One of our exercises was to physically direct a short scene in a script consisting of about 5 beats. One person wanted to shoot the whole scene as one shot.
This choice was completely fine but it meant that any changing beats were not defined by cuts. It could read like theatre, as if we’re just recording the action. Even if you as a director can “feel” the beats being played out using one shot, the audience may not. Adding cuts punctuates these beats.
If you’re going to do away with cuts, than you will have to find other ways to define the beats.
5. Directors must be like builders.
Another person in the class pointed out how incredibly involved we were becoming in the minutiae of the scenes, the beats and the premise. Is this involvement with all the small details actually getting through to the audience? Would they recognise these details?
Ian gave us an analogy about builders, something to the affect of:
What Ian was saying was that by being involved in the minutiae, you can make sure that a story is coherent. An audience won’t see all the thoughts that have gone into the foundations like the premise but they will understand the story overall. And even if they can’t articulate why they feel this way, they will understand that the story has been told well and maybe they’ll say:
6. Know who is driving the scene.
In a scene, even in shots, there tends to be one character who’s intention is more dominant than other characters or elements. Their intention is probably driving the story forward. This character is said to be “driving the scene”. It’s important to understand which character this is so that you can give them more screen space or screen time.
In this scene, Remy (the grey rat) is telling Emile (the brown rat) about his passion: food. When he discovers that Emile has a fantastic piece of cheese in his bag, he can’t contain his excitement. This translates to Remy being the more animated of the two and the character the camera follows more. Emile’s movements are smaller so as not to draw the focus away from Remy and he is awarded less screen time.
Despite Remy being the main character for the film, he doesn’t drive every scene. In this scene:
– Remy is trying to help Linguini the chef to cook. Linguini is venting his frustration at how Remy is biting and scratching him under his shirt in a bid to control his movements.
Linguini is driving the scene. This means that most of the shots are shot at human eye level, rather than at the eye level of Remy. As a result, Remy is smaller on screen and his intentions are diminished along with the size of his character. This makes us feel as if we are with Linguini and reinforces the fact that his motivations are driving the scene.
7. Actors are the guardians of their character.
This is particularly true for episodic actors who have a history of playing this character. They are likely to know how the character will react and feel in certain situations.
If you as a director are uncertain of whether an actor should, say, deliver a line with sincerity or sarcasm, it is important to consult the actor on how they feel the character would act. Actors can help you to maintain consistency with the character by protecting their character’s behaviours.
8. You don’t have to play games with actors.
I asked Ian: “If you wanted an actor to feel intimated in the shot, would you as a director go about bullying them on set to make them feel intimidated?”
Ian responded with how he doesn’t play games with actors.Allegedly some directors do “monster” their actors, but you don’t have to. Ian knows he can achieve the results he wants in other ways. Part of that is in respecting an actor’s process and in recognising when they’re about to “pop”. If they’re about to give you the performance you need (eg. about to cry), you can rework your shooting schedule to shoot their crying shots first.
9. Tension is the enemy of the actor.
Actors spend time learning to relax so they can embrace their role. Bringing tension to the set can mess with their process.
So try to keep the set relaxed. Chill.
10. Story is king.
And finally, my absolute favourite lesson of the day was simply this:
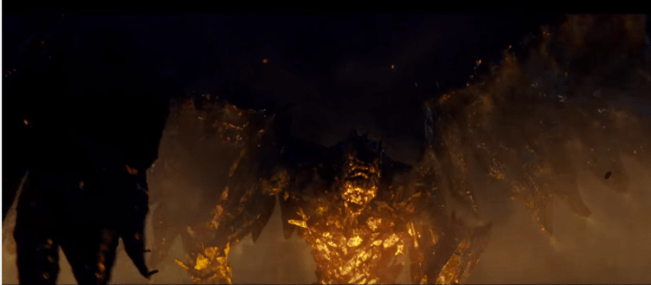
If you haven’t seen our latest Pepsi Ad for Japan, I encourage you to watch it now because it’s THOOPER KEWL!
It’s a take on the Japanese folk story of Momotaro (known as Peachboy) where a boy with various animal companions travels to an island to fight demons. This Pepsi Ad is the fourth installment (the series starts at zero) where the new demon seen (known as an Oni) is winged. I guess it’s mimicking the pheasant in the story? Who knows. All you need to know is it’s AWESOME.
I’m very fortunate to have had 4 shots on this ad. 2 of them are CG bird shots and 2 are simple Oni shots. The bulk of the animation was provided by our wonderful lead animator Chris.
The Oni shots were interesting in that the Oni is bigger than a multi-storey building, and so he had to move very slowly due to gravity having a greater effect on his mass (see 01:34). This was new for me as I’d never animated something that was meant to be so large, but our lead taught me to follow reference footage, extend the animation keys out over more time and then go back to tweak overlapping body parts.
The bird shots were tricky in that they had to be realistic movements of fast birds shot in slow motion. There also had to be about 25 of them customised to fly in random directions in one shot(see 00:25). This meant using a basic flight cycle for most of them and then varying their gliding and flapping motions over their flight paths. Then some of them were also perched on the walls and on ledges, so they had to have their own custom animations of them looking around or walking or taking off. All of these factors relied on one thing for pulling it off: study, study, study.
Reference footage like this:
-was a Godsend. It’s one example of the many Youtube videos I watched to get their movements working well. And although it may sound like a bit much for a 2 second shot –
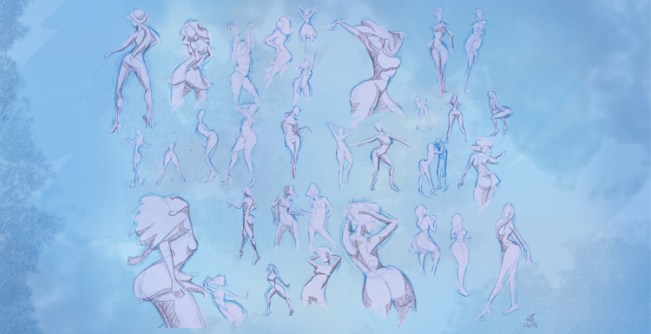
Sometimes Everyday I hear a song that makes me feel like dancing. So here are some sketches I did in my down time inspired by beautiful women dancing like rockstars in the Pharell video clip “Come Get it Bae”.
Take it easy on the clutch.
If you haven’t seen the video, take a look.
I will willingly take the blame when you inevitably start dancing too.
Steel yourself for 2 seconds of AWESOME PAPER AIRPLANE. It’s going to change your life and hopefully mine when everyone realises all my animation skills are wrapped up in those precious few frames.Praise will flock in from every corner of the globe and I will ride on the back of this paper vessel into the future of awesome.
Ok, ok, so it’s just one simple arc of it travelling between 2 floating houses, but you know what? I’m still pretty proud to be apart of the team that helped pull the whole thing together. I can’t claim a lot to do with getting to the finished product (that credit goes to the rest of the amazeballs people I work with) but I can say I helped out with some layout, basic animation of the house and the little origami wonder that probably contains some message about how awesome ‘Game of Thrones’ is. I mean, what else WOULD it say?
The amazing VFX (and that paper airplane) can be viewed here in the new spot for Optus promoting Unlimited Broadband:
And in addition, the glowing reviews we received can be found HERE!
In the 3 months since officially becoming a junior animator at Alt.vfx (woo!), I’ve realised that I have also learnt something else: I can now sprechen ze language of advertising.
Yes, let’s review the “Hwip”. Source: Precision Nutrition.
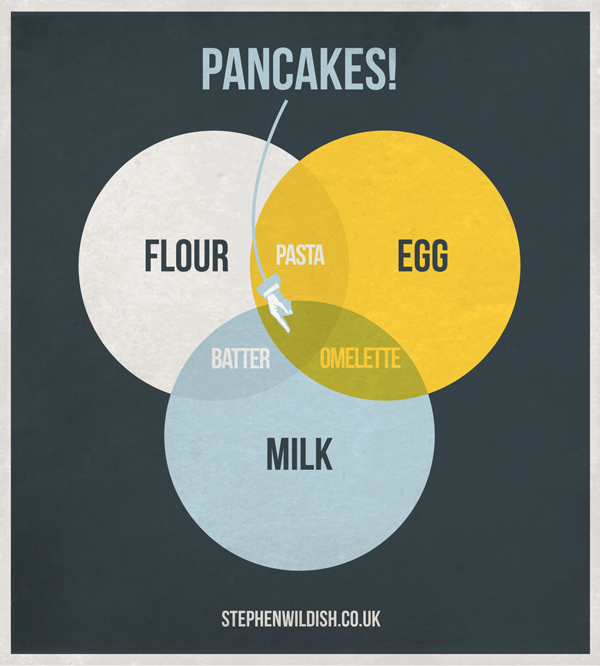
Now this may not seem like a major thing for some cool whoozits out there, but imagine me in my all noob-ness wading into these kind of doozies: 1. “Hey, we’re having a WIP review at 1pm.” -OR- 2. “Can you just cache out me out an alembic?” – and having no idea what anyone is talking about. It’s like everyone is speaking Klingon while I only speak all things pertaining to cake. So I took note of some of the terms I’ve come to understand while working in post-production and turned them into a Venn Diagram, because let’s face it, WHO DOESN’T LOVE A GOOD OL’ VENN DIAGRAM?
Click to enlarge!
Here are some of the confusing terms I’ve learnt and how they can relate to each other across the animation department, the VFX department and TVC’s in general. Now putting them in Venn formation doesn’t necessarily make them easier to understand, it just shows how terms relate and what arenas they concern most. But never fear! Your translator is here. Prepare for a blabbering list of explanations: TVC = Television Commercial. They’re the things that break up a 90 minute movie and turn it into a four hour marathon. CAD = Commercials Advice. In Australia, they’re the service that classify the ads before the ad is broadcast. Here’s a gem that didn’t pass through CAD according to the video description:
I swear Spot the dog used to have more than 1 spot. Source: Unbound.
SPOT = Another term for advert. Some campaigns for the same product may have several spots cut to lengths ranging from 15sec to a few minutes. Also, it’s the name of an adorable dog. SUPERS = Text that is superimposed over the main image eg. “The Small Print”. ARCHIVE = When the ad has been broadcast and the files are not currently required, the project files are taken off the server and stored on a tape. The project goes from being “live” to being “archived”. POS = Point of Sale. At Alt.vfx, sometimes we supply images from the ad to be placed in a store near the cash register . V/O = Voice over. FYI: Morgan Freeman voice over is the bees knees.
FRAME HANDLES = Uber important! If a shot is 80 frames long in an edit, the animation and visual effects department may in fact be working with 100 frames (10 extra frames either side of the 80 frames) so that the final edit can be extended or slipped if required. These extra frames are called “frame handles”. GRADE = A nickname for colour-grading the image. When footage is initially retrieved from the camera, the colours look like my hair when wet (“flat”, dull and washed out). It is up to Compositors and Colour Graders to “nourish” and “revitalise” the colours to the correct hues that suit the mood of the ad. WIP = Work in Progress Client Approval = The client could be a director, an advertising agency or the media team of the company being advertised, but either way, they need to give the tick on different elements along the way. Massive Rig/Custom Rig = Alt has done a few ads requiring software called “Massive”. It specialises in creating digital crowds of whatever you need (in Alt’s case, deer and human armies). Any animation/motion-capture animation created for Massive needs to be exported for the simplified Massive rig. However, it is possible to modify the Massive rig to include extra controls. Modifying the rig is known as a Custom Rig. RX, RY, RZ and TX, TY, TZ = Rotate in the axis X,Y,Z and Translate in the axis X,Y,Z. I’ve carried these over from Animation Mentor because it’s so much easier to understand if you want a character to move in TZ space rather than saying: “move him forward” if the character’s “forward” direction actually means it moves left on camera.
Mmm, my kind of layout.
LAYOUT = Laying out tracks and 3D elements required for a shot with little to no animation in a 3D scene ready for an animator to animate. TRACK = A 3D representation of the actual scene that was shot with a live camera. A track should include the camera’s movement and any object tracks. Object tracks are tracks created for any moving objects that will need to interact with 3D elements. For example, in the Honda ad, we were given an object track for the hands to attach a 3D wheel to. ALEMBIC FILE = A file type that animation is exported as so that it can be used in other software like Houdini or Soft Image. MEL/PYTHON = Scripting languages. MEL stands for “Maya Embedded Language”. If you speak MEL and Python, you can control more within some softwares and eventually rule the world! CACHE = In computing, a cache is a way of storing and accessing data. Within visual effects, a cache is an exported version of a 3D element that only stores the element’s 3D vertices and doesn’t export any skeletons or rig controls. This is a much lighter and less fussy way of importing animation into programs outside of Maya. COMP = Composite. Each layer within a shot will end up here and when it’s exported out, I like to say it’s Straight Outta Compin’. MATTE = An image element that will be layered with 1 or more other images. ROTO = Rotoscope. Within animation, roto means to trace over footage frame by frame. In VFX, it’s a similar concept, except that they are only concerned with the silhouette. If you have the roto of, say a person, you can use that silhouette as a matte to outline the person, cut them out and place the person on their own layer. This is super useful if you have to layer that person in front of or behind sections of the image. PLATES = Footage. I believe it’s a throwback term to how film was once processed using glass plates, but now in VFX we use the term to describe a background image or a foreground matte. Particularly within animation, you need a background plate of the live footage within your animation scene so that you can see how your animation lines up with the geography of the scene. PHEW! That was a lot of explaining. It may not interest everyone, but for those out there who may be a little confused about studio terms that are thrown around like hot cakes, this might help you out! And speaking of hot cakes, I think I know what I’m having for breakfast tomorrow.
fxguide included one of the ads I worked on in a “Jaw-dropping effects” article.
Pretty much, if you wanted to translate the amazing feeling I’ve had into a song, it would be this:
To start at the top, I’ve recently been on trial as an animator at alt.vfx (the studio where I started out as a production assistantin client service over a year and a half ago). I KNOW, CRAZY COOL RIGHT!?! You can actually work your way up from the bottom like a couple of mailroom monsters.
Like Mike and Sully in ‘Monster’s University’! Source: flickr
In that trial time, I worked as one of the animators of some CG birds for the Woolworths supermarket spots in Australia:
– and also this slick ad for Honda HRV:
Pretty cool right? With the birds, I just adjusted some recycled animation, but with the Honda ad, I was responsible for the car-forming shots and a bit of layout. Maybe that doesn’t sound like a lot but the car-forming shot meant I had to sort out every piece of geo on the car (and I mean EVERY nut, screw and bolt) and create multiple revisions on how the car should form.
Then of course our cray-mazing lighters, compositors and editors put it together to look realistic.
What’s really cool is that fxguide then reviewed that work in this article:
– which also includes reviews for television commercials from the studio Framestore, MPC and Method Studios.
That’s right guys: alt.vfx is up there with the best of them.
The same day that article was published (2 days ago) I was then officially offered a full-time role as a junior animator. So now I work at one of the best studios in Australia. Could the day get any better!?
Oh and I had a low-carb burger for lunch and it still tasted as good as a real burger. CAREER AND HEALTH FOR THE WIN!
So watch this space for updates on the next round of ads! It’s some cool stuff and I’m excited to share it with you!
In the beginning, the Food God (a talking cookie) created the hummus heavens and the eclair earth. And Food God said, “Let there be a buttery vessel that will teach Stephanie a lesson about animation!”, and there were croissants.
I’m assuming that’s how croissants were born because there must have been a divine God to create something so delicious AND wise at the same time.
Thanks for your creation talking cookie! You really helped me to improve this animation:
The lesson all began when I posted about improving your field in the art ecosystemby exploring other areas of influence. So two weekends ago, I decided to explore making croissants!
Now making croissantsis no mean feat. It took me 2 days. 2 DAYS. From butter making love with dough to mouth = 2 days. It’s not that I read the recipe at the speed of rock, it’s that the layers of a croissant require butter to be folded into the dough and then left for an hour to rise. Then taken out of the fridge and rolled out, folded, left to rise, rolled out, folded, yada yada and so on for a total of 4 times.
The fatty moon ships of buttery gold that I made. *Descends into gargling drool pit* – gluhhhghggh…
Where the croissants emphasised a lesson of value was in the rising. In the step where I put the pastry in the fridge to rise and do something else for an hour and come back, the pastry has changed. It’s risen. When I roll out the dough, I can start to see more layers of the butter than when I first began.
That butter must be rich because it’s rolling in dough. HEY-OH! Double pun! Source: Girl +Food = Love.
Improving animation is sometimes like making croissants. In the time between when you think an animation is finished, and you go back to improve it once more, something has changed. YOU have changed. You’ve gone away from it, thought about Mario Kart/life, and come back to something completely different to the way you left it. Like the layers of butter being exposed in the pastry, suddenly the flaws in your animation rise to the surface and you can see what everyone was talking about when they said something could be improved.
Why does this happen? I think it’s because you stepped away from it and came back with a level of openess to viewing the whole piece, rather than focussing on the individual cogs that make up the machine.
Woah, that’s some Kum Ba Yah stuff I just said right there.
Even Richard Williams says he viewed his work differently after he finished his film The Little Island (1958):
“Three years later, when I’d finished the film, the unpleasant realisation slowly crept up on me that I really didn’t know very much about animation articulation, that is, how to move the stuff.” The Animator’s Survival Kit: Expanded Edition 2009, p1.
That’s what happened to my Tailor animation. About a year ago, I handed in this jumping ball with a tail thinking that I’d done a great job. Yet I was left with the advice that I should track the tip of the tail to improve it. I didn’t see the point.
A year later, I viewed it back and instantly could see that something was off. I tracked the tail as I’d been advised and voila! I could see the problems with my haphazard motion path:
Tracking the tip of the tail shows a jagged motion path.
What I learnt about squirrels is that they can move ridiculously fast. They dart around, a bit like birds. That’s why it makes sense when Hammy the squirreldrinks an energy drink in Over the Hedge (Kirkpatrick & Johnson, 2006) which makes him runs so fast that he sees the world stand still. That’s why Scrat in Ice Age (Wedge & Saldanha, 2002) can hop up and down in just 3-4 frames and it doesn’t phase the audience.
SQUIRRELS. ARE. FAST.
So I did a test at work one day with a new Squirrel rig and made my squirrel bounce fast and low like a real squirrel:
The other thing I realised is that if the squirrel is moving fast (and it’s not actively controlling the tail), then it doesn’t look right if the tail moves in huge, glorious arcs. If it’s moving low and fast, the tail is more likely to stream out behind it in a small wave path. Bigger tail arcs are for bigger and slower jumps.
BIG TAIL ARCS = slow.
SMALL TAIL ARCS = fast.
It sounds obvious, but I totally didn’t get that before. This time with the new animation, I made sure to plan the arcs of the tail (using the Blue Pencil Maya plugin) so that the tail movement fit the body:
The new arcs are much smoother and prettier!
If you want a breakdown of how I animated the squirrel, it was the main body control first, then spine, head, mouth, ears and finally the tail. When animating the tail, I tried to copy/paste the curves of the first joint down onto the second joint, but the result was a big wave that wasn’t even following the arcs that I wanted, so I pretty much tweaked the whole tail as one once the key poses were in. This is what it looked like in the end:
Thanks to stepping away from the animation and coming back, I think the results are much more satisfying than my previous attempt. Maybe a month from now, I’ll see even more areas for improvement.
In short, if you have a shot that you think is polished and you can’t see anything wrong with it, give it time. Move on to something else, grab a croissant and come back when you can view your piece like new. Maybe something will reveal itself as an area to fix. Then you can grab another croissant and get to work!